


TL;DR:
- Replacing a MacBook battery restores power when the original no longer holds a full charge.
- Options include official Apple service, independent workshops, or DIY replacement, each with different costs and risks.
MacBook battery replacement is the process of restoring your device’s power capacity by installing a new battery when the original no longer holds sufficient charge. Most MacBook owners notice the problem gradually: shorter runtimes, unexpected shutdowns, or a “Service Recommended” alert in macOS. The good news is that you have real options, from Apple’s official service to a careful DIY swap at home. This guide covers every path, including what tools you need, how much each option costs, and how to keep your new battery running strong for years.
How to check your MacBook battery health and know when to replace it

Battery health in macOS is measured by two things: cycle count and remaining capacity. Apple defines a full charge cycle as one complete 100% discharge, whether done in one session or spread across multiple partial charges. Most MacBook batteries are rated to retain 80% capacity after 1,000 charge cycles, which typically takes 3–5 years of normal use.
To check your numbers, go to System Settings > General > About, then click System Report > Power. You will see your current cycle count and a battery condition status. macOS reports four possible statuses:
- Normal: Battery is performing as expected.
- Replace Soon: Capacity has dropped noticeably but the battery still functions.
- Replace Now: Capacity is significantly reduced and replacement is advised.
- Service Recommended: The battery holds less than 80% capacity or is showing abnormal cell behavior. This is the clearest trigger for replacement.
A swollen battery is a separate and urgent situation. Swelling results from internal chemical degradation that produces gas inside the cells. Stop using the MacBook immediately, do not press on the battery, and take it to a professional. This is not a DIY situation.
Pro Tip: If your MacBook shuts down unexpectedly at 20–30% charge, that is a strong sign of battery failure even before a “Service Recommended” alert appears.
What replacement options are available for your MacBook battery?
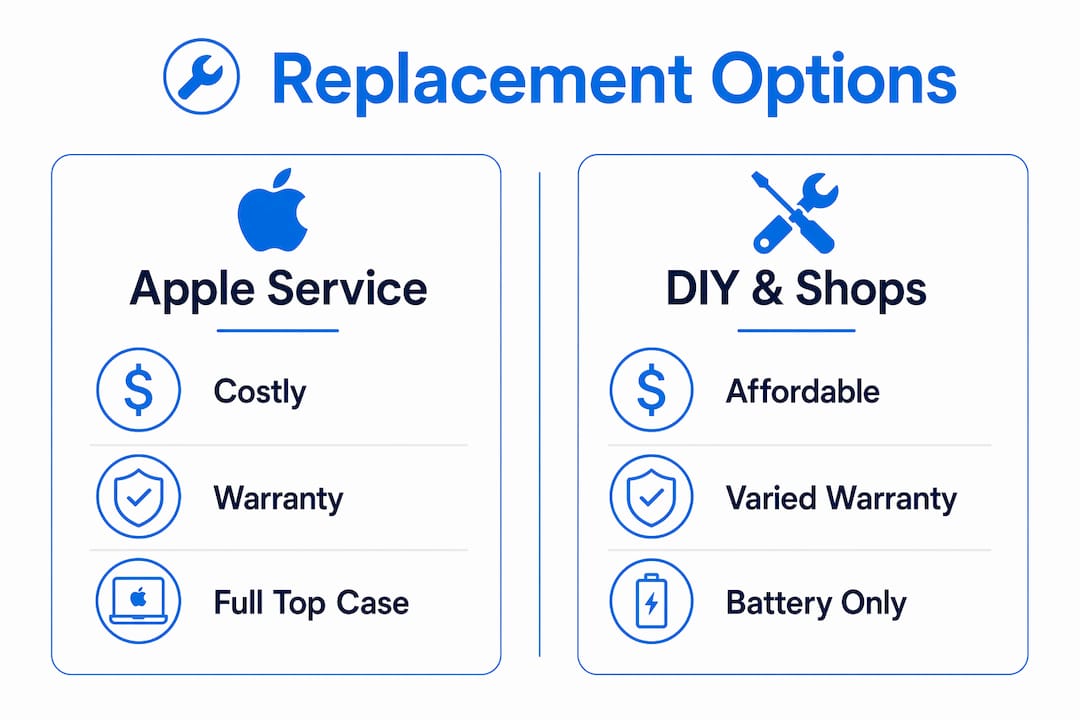
Three main paths exist for battery replacement: Apple’s official service, an independent professional workshop, or a DIY repair. Each has a different cost, turnaround time, and risk profile.
Apple’s official service
AppleCare+ covers free battery replacement if capacity falls below 80% during the coverage period. Outside of AppleCare+, Apple’s service often involves replacing the entire top-case assembly, which includes the keyboard and trackpad. That approach costs $400–$700 or more, making it the most expensive option by a wide margin. The benefit is that Apple uses genuine parts and the repair is backed by Apple’s warranty.
Independent professional workshops
Independent shops typically replace the battery only, without swapping the entire top case. Professional workshops provide replacement with a 180-day warranty and use batteries tested for capacity, resistance, and safety before installation. The cost is significantly lower than Apple’s official service, and turnaround is often same-day or next-day. The key variable is parts quality. A shop using low-grade cells will produce a repair that fails within months.
DIY replacement
DIY is the cheapest route. Replacement batteries cost roughly $50–$100, and the labor time runs 1–3 hours depending on your MacBook model. The risks are real: a mistake can damage the logic board, and the repair voids your manufacturer warranty. DIY makes the most sense for out-of-warranty machines where professional repair costs exceed the MacBook’s value.
| Option | Estimated Cost | Warranty | Key Risk |
|---|---|---|---|
| Apple official service | $400–$700+ | Apple warranty | High cost, full top-case swap |
| Independent workshop | Lower than Apple | 180-day typical | Parts quality varies |
| DIY repair | $50–$100 parts only | None | Hardware damage, voided warranty |
Pro Tip: Always ask an independent shop which battery brand they use and whether it has been bench-tested for capacity and internal resistance before you agree to the repair.
What tools and preparations do you need for a DIY MacBook battery replacement?
Preparation is the difference between a clean repair and a damaged logic board. Gather every tool before you open the case. Stopping mid-repair to find a missing screwdriver is how accidents happen.
Essential tools
- Pentalobe screwdriver (P5): Opens the bottom case on most modern MacBooks.
- Tri-point Y000 screwdriver: Required for battery connector screws on newer models.
- Plastic spudger and opening picks: Safely pry the case and disconnect connectors without scratching metal.
- Adhesive remover or isopropyl alcohol (90%+): Softens battery adhesive strips for cleaner removal.
- Anti-static wrist strap and mat: Protects the logic board from electrostatic discharge.
- Tweezers and a magnetic parts tray: Keeps tiny screws organized and prevents loss.
Workspace setup and safety
Work on a clean, well-lit, flat surface. Discharge your MacBook to below 25% before starting. A lower charge level reduces the risk of a thermal event if the battery is accidentally punctured. Battery adhesives vary by MacBook generation: older models use screws and moderate glue, while newer models use heavily bonded stretch-release adhesive strips. Know which type your model uses before you start.
Pro Tip: Cross-reference your MacBook’s exact model number (found under System Settings > General > About) with a repair database before purchasing a replacement battery. A battery rated for the wrong model will not fit correctly and may report inaccurate health data.
Step-by-step guide to replacing a MacBook battery yourself
Follow these steps in order. Skipping steps, especially around adhesive removal and connector handling, causes most DIY failures.
- Power down completely. Shut down macOS fully. Do not just close the lid.
- Discharge to below 25%. Boot up, drain the battery to a safe level, then shut down again.
- Remove the bottom case. Use the P5 pentalobe screwdriver. Set screws in a magnetic tray in the order you removed them.
- Disconnect the battery connector. Use a plastic spudger to gently lift the connector straight up. Never pry at an angle.
- Soften the adhesive. Apply adhesive remover or isopropyl alcohol along the battery edges. Wait 2–3 minutes. Modern MacBooks use stretch-release adhesive strips that pull out at a low angle. Older strips often fail with age and need controlled solvent application.
- Remove the old battery. Pull adhesive tabs slowly at a 45-degree angle. If resistance is high, apply more solvent and wait. Do not force it.
- Clean the battery bay. Remove adhesive residue with isopropyl alcohol and a lint-free cloth.
- Install the new battery. Seat it firmly in the bay. Reconnect the battery connector with gentle, even pressure until it clicks.
- Reassemble the bottom case. Replace screws in reverse order. Do not overtighten.
After installation, do not skip calibration. Performing 2–3 full charge and discharge cycles after replacement helps the battery charge controller adjust its capacity reporting accurately. This step directly affects how long your battery lasts and how reliably macOS reports remaining charge.
Pro Tip: After reassembly, hold the power button for 10 seconds to reset the System Management Controller (SMC). This clears any cached battery data and helps macOS recognize the new battery correctly.
Common post-installation issues include macOS showing “Service Recommended” immediately after replacement. This usually clears after 1–2 full charge cycles. If it persists, the replacement battery may be defective or incompatible.
How to prolong your MacBook battery life after replacement
A new battery is only as good as the habits you build around it. The following practices extend battery lifespan significantly.
- Enable Optimized Battery Charging. Go to System Settings > Battery and turn on Optimized Battery Charging. macOS learns your charging patterns and holds the charge at 80% until you need a full charge. This reduces stress on the cells.
- Avoid extreme temperatures. Heat above 95°F (35°C) degrades lithium-ion cells faster than any other factor. Never leave your MacBook in a hot car.
- Do not keep the battery at 100% for extended periods. Plugging in overnight every night accelerates wear. Optimized Charging handles this automatically when enabled.
- Update macOS regularly. Apple ships power management improvements in system updates. Staying current keeps your battery running at peak efficiency.
- Check battery health every few months. A quick look at System Report > Power takes 30 seconds and gives you early warning before the next replacement becomes urgent.
Pro Tip: Avoid deep discharges below 10% on a regular basis. Lithium-ion batteries prefer shallow cycles. Keeping your charge between 20% and 80% most of the time is the single best habit for long-term battery health.
Key Takeaways
A successful MacBook battery replacement depends on accurate health assessment, choosing the right service path, using quality parts, and calibrating the battery properly after installation.
| Point | Details |
|---|---|
| Know your replacement trigger | Replace when macOS shows “Service Recommended” or capacity drops below 80% after 1,000 cycles. |
| Choose the right service path | Apple official service costs $400–$700+; independent shops cost less and offer 180-day warranties. |
| Prepare fully before DIY | Gather pentalobe and tri-point screwdrivers, spudgers, adhesive remover, and an anti-static mat before opening the case. |
| Calibrate after installation | Perform 2–3 full charge and discharge cycles so macOS reports battery capacity accurately. |
| Protect the new battery | Enable Optimized Battery Charging and keep the MacBook away from heat above 95°F to maximize lifespan. |
What I’ve learned after years of MacBook battery repairs
The most common mistake I see is people buying the cheapest replacement battery they can find online. I understand the logic: the repair is already stressful, and saving $30 feels like a win. It is not. Cheap batteries fail within 12 months with alarming regularity. You end up doing the repair twice, and the second time you are dealing with a machine that has already been opened once, which means worn screw heads and stretched adhesive.
The second mistake is skipping bench testing. Battery replacement is more than a parts swap. A battery that passes a basic capacity test can still have high internal resistance, which causes voltage sag under load and makes the MacBook feel sluggish even with a “full” charge. Professional technicians test for both capacity and resistance before fitting a battery. If you are doing DIY, buy from a supplier that publishes test data for their cells.
The third thing I want to flag is the evolving complexity of MacBook repairs. Apple’s newer models use increasingly bonded designs. The adhesive situation on a MacBook Air M2 is genuinely harder to manage than on a 2015 MacBook Pro. If you have never done a repair before, start by watching a model-specific teardown video at least twice before touching a screwdriver. Confidence without preparation is the fastest route to a cracked trackpad cable.
My honest recommendation: if your MacBook is under AppleCare+, use it. If it is out of warranty and the machine is worth keeping, find an independent shop with a clear warranty and a willingness to show you the battery brand they use. DIY is a valid last resort, not a first choice.
— Samrudha
Power up your MacBook setup with Aussiezgoodshubs
After a battery replacement, your MacBook is essentially a refreshed machine. Getting the charging setup right from day one protects your investment.

Aussiezgoodshubs stocks the Apple MagSafe 45W Power Adapter for MacBook owners who want a genuine charging solution that works with macOS power management. For a versatile desk setup, the iQuick T5 wireless charger stand keeps your full device lineup topped up without cable clutter. Aussiezgoodshubs also carries a 7-in-1 cleaning kit that is genuinely useful for post-repair cleanup, removing adhesive residue and dust from ports and keyboards. Fast shipping and easy returns make it a practical first stop for MacBook accessories in Australia.
FAQ
How do I know when my MacBook battery needs replacing?
macOS will display a “Service Recommended” status when battery capacity drops below 80% or cells behave abnormally. You can check this under System Settings > General > About > System Report > Power.
Does replacing a MacBook battery void the warranty?
DIY replacement voids the manufacturer warranty. AppleCare+ covers free battery replacement if capacity falls below 80% during the coverage period, so check your coverage status before attempting any repair.
How long does a MacBook battery replacement take?
A professional shop typically completes the repair same-day or next-day. DIY replacement takes 1–3 hours depending on your MacBook model and experience level.
What does battery calibration after replacement involve?
Calibration means performing 2–3 full charge and discharge cycles after installing the new battery. This helps the battery charge controller report capacity accurately and extends overall battery lifespan.
Is a swollen MacBook battery dangerous?
Yes. A swollen battery is a serious safety hazard caused by internal chemical degradation producing gas inside the cells. Stop using the MacBook immediately and take it to a professional for replacement.


